Abstract
A description of the digital workflow construction of an occlusal splint from chairside to laboratory to patient appliance delivery.
From Volume 2, Issue 1, March 2025 | Pages 45-48
A description of the digital workflow construction of an occlusal splint from chairside to laboratory to patient appliance delivery.

An occlusal splint is commonly defined as a removable appliance that covers part or all of the occlusal surfaces of the teeth in either the maxillary or mandibular arches.1 When designed for the upper arch, this type of full-coverage stabilization splint is termed a Michigan splint. For the lower arch, it is known as a Tanner appliance. In clinical experience, lower appliances tend to be more tolerable for patients prone to a gag reflex, potentially offering better compliance.
The purpose of a stabilization splint is to provide patients with a removable occlusal scheme that supports the principles of a mutually protected occlusion.1,5 This scheme generally includes canine guidance on the working side, with the disclusion of contralateral posterior teeth during lateral excursive movements and anterior guidance during protrusive movements, in which the anterior teeth engage and posterior teeth disclude.
Historically, occlusal stabilization splints were fabricated by dental technicians using impressions taken with rubber or silicone-based materials, complemented by an analogue facebow registration. This information enabled technicians to mount the casts on a semi-adjustable articulator based on the mandibular–maxillary relationship indicated by the facebow. The occlusal space required for the hard acrylic splint material would be predetermined by the clinician, typically with the aid of a leaf gauge to measure inter-occlusal clearance. The clinician would then record this inter-occlusal relationship using a low-viscosity silicone material for accuracy.
The advent of CAD/CAM (computer-aided design/computer-aided manufacturing) technology has significantly accelerated the construction process of occlusal splints, providing both patient and clinician with a more streamlined, comfortable record-taking experience.2,3 Modern intra-oral scanners facilitate digital recording of the soft and hard tissues by processing light reflection on the surface, which is then displayed on-screen via algorithmic interpretation within the software.2
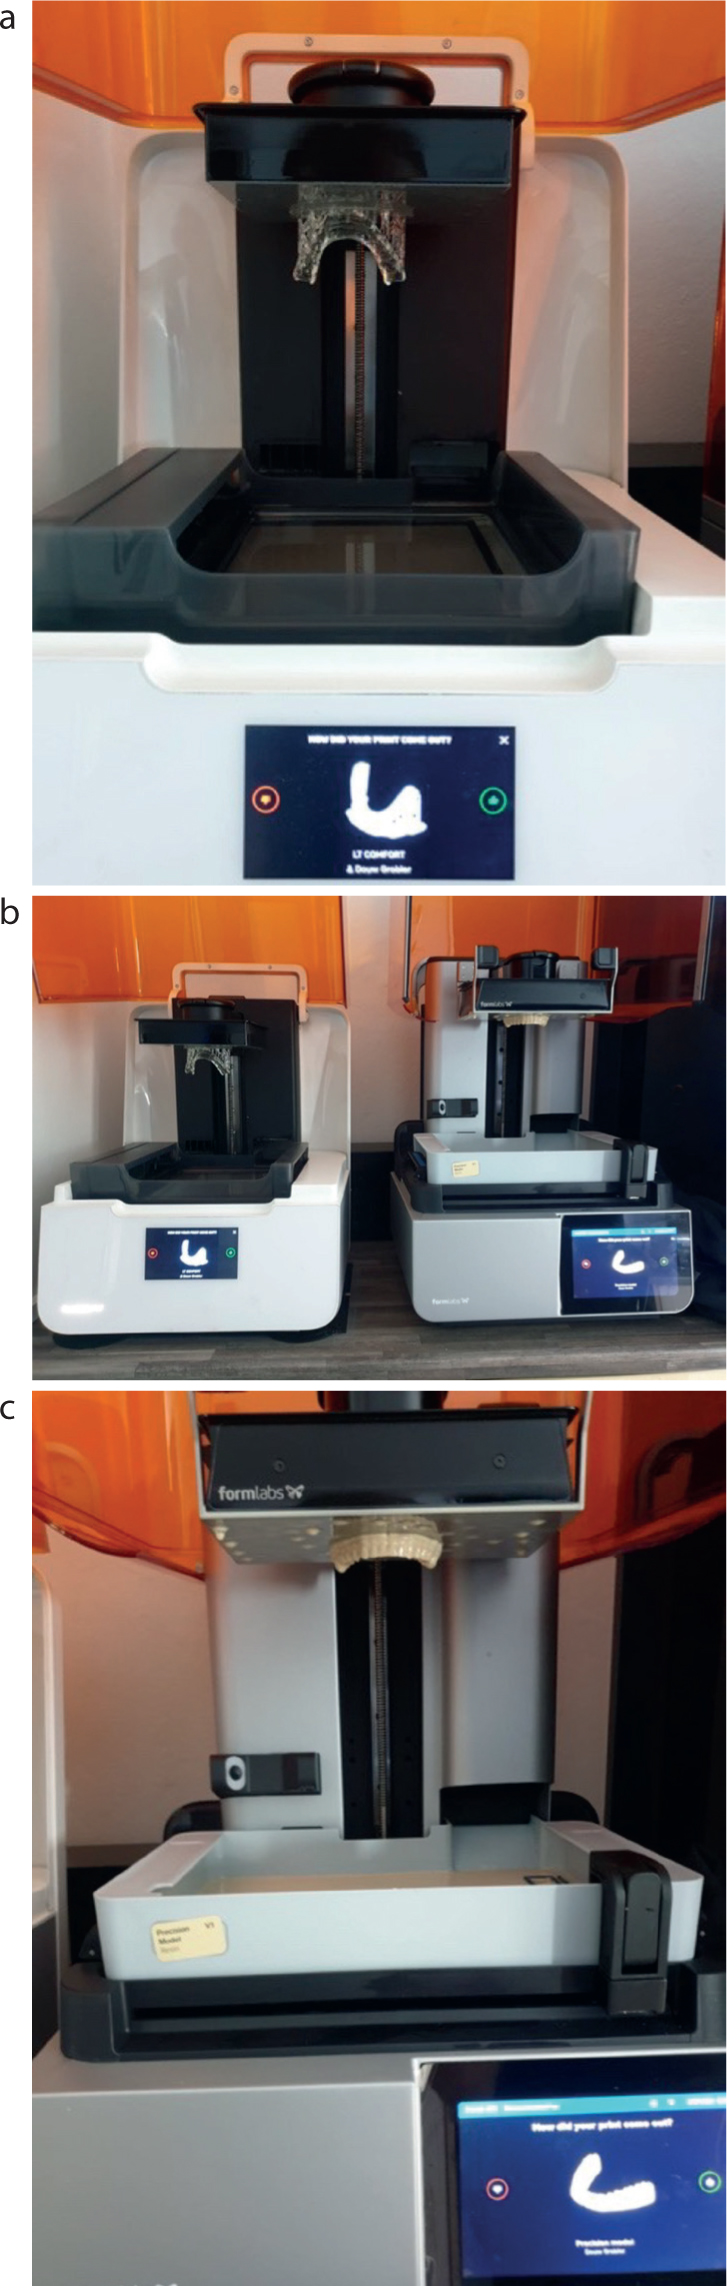
In dentistry, both 3D milling and 3D printing are transformative technologies, but they serve different purposes and have clear advantages.6,7 3D milling involves subtracting material from a solid block, allowing for precise and durable restorations, such as crowns, bridges and dentures, often using materials that include zirconia or titanium. This process offers high accuracy and strength, making it ideal for functional dental applications.6,7,8 On the other hand, 3D printing builds objects layer by layer using various resins or metals, offering greater flexibility in design and the ability to produce complex geometries.4 While 3D printing is often used for creating models, surgical guides, occlusal splints and temporary restorations, it can be less durable than milled products.7 Both technologies complement each other in modern dental practices, with milling typically preferred for final restorations and printing for prototyping and less demanding tasks.6,8
Patzelt et al3 examined the efficacy of digital workflows in constructing Michigan-style occlusal splints and the findings indicated that digital workflows not only enhanced efficiency, but also improved the overall precision and outcome of the appliance.3
AI generative design has transformed the planning of 3D dental splints by using algorithms to enhance structure, fit, and performance.4,7 By inputting patient-specific data, such as scans or digital impressions, AI can generate highly customized splint designs that enhance comfort, functionality and efficiency.6 The AI system studies factors that include bite alignment, material properties and pressure distribution, ensuring the splint fits perfectly and performs efficiently. This approach accelerates the design process and improves precision while lessening the risk of errors and enhancing patient outcomes.5
Although a dental technician designed the case described below, the technology is available to clinicians, and is supported by many digital manufacturing companies.
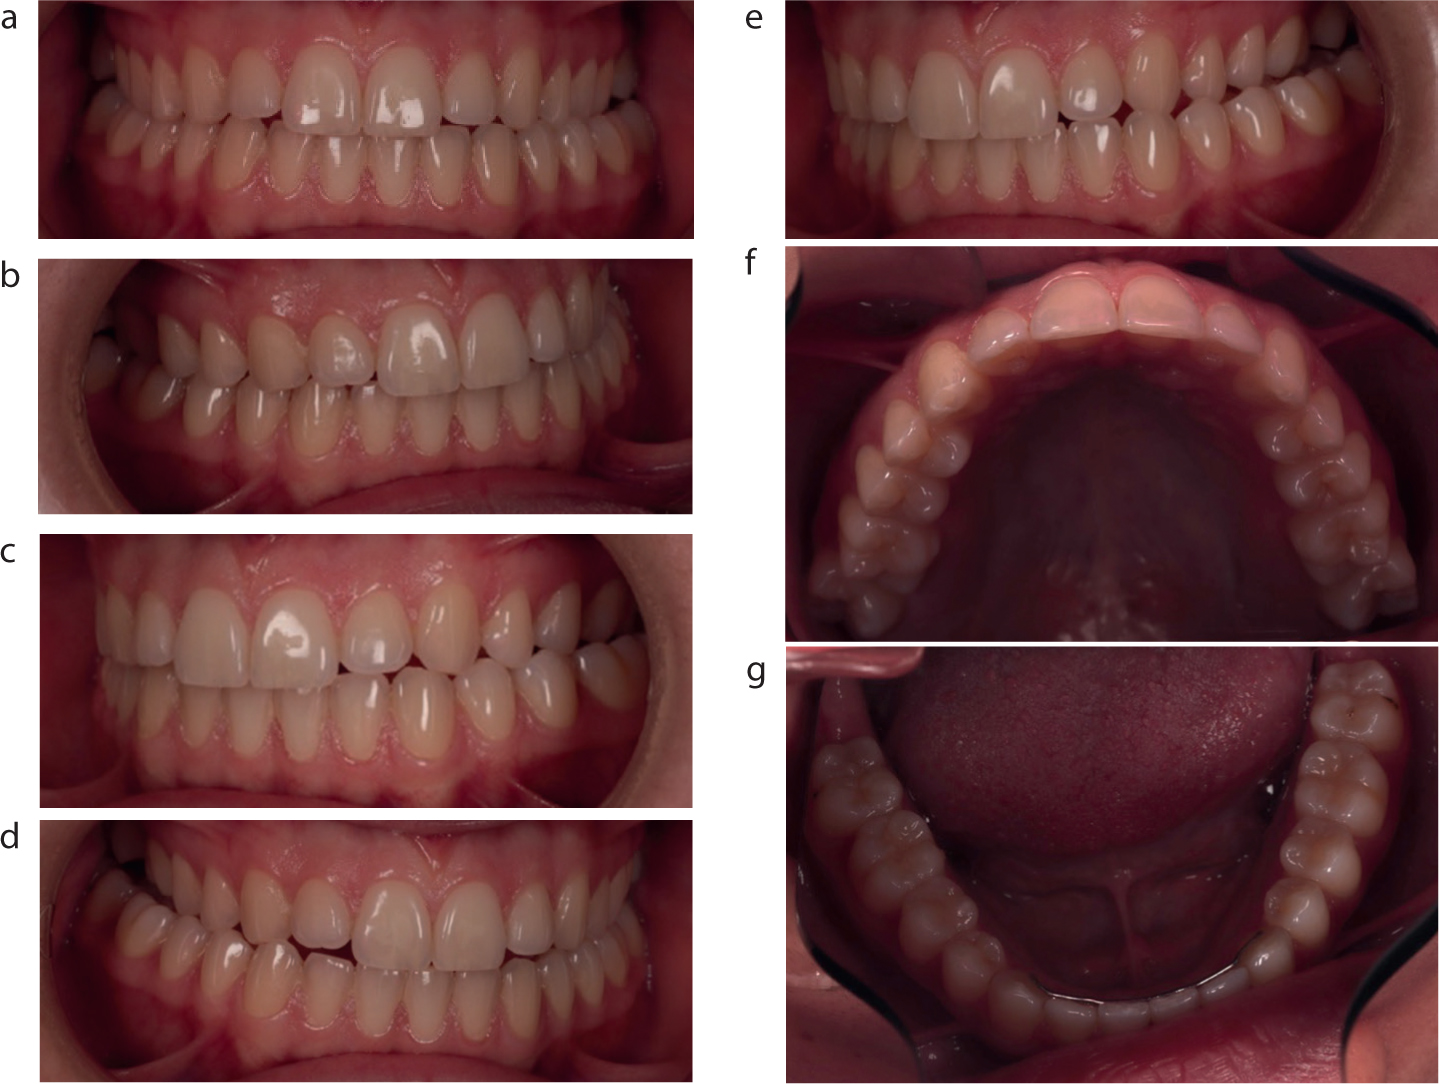
A 23-year-old female patient with a history of bruxism presented for treatment (Figure 1). Having previously consulted a physiotherapist for myofascial management, she reported recurring headaches attributed to her bruxism. Following a standard dental check-up, a digital scan was taken using a TRIOS5 (3Shape, Copenhagen, Denmark) intra-oral scanner.
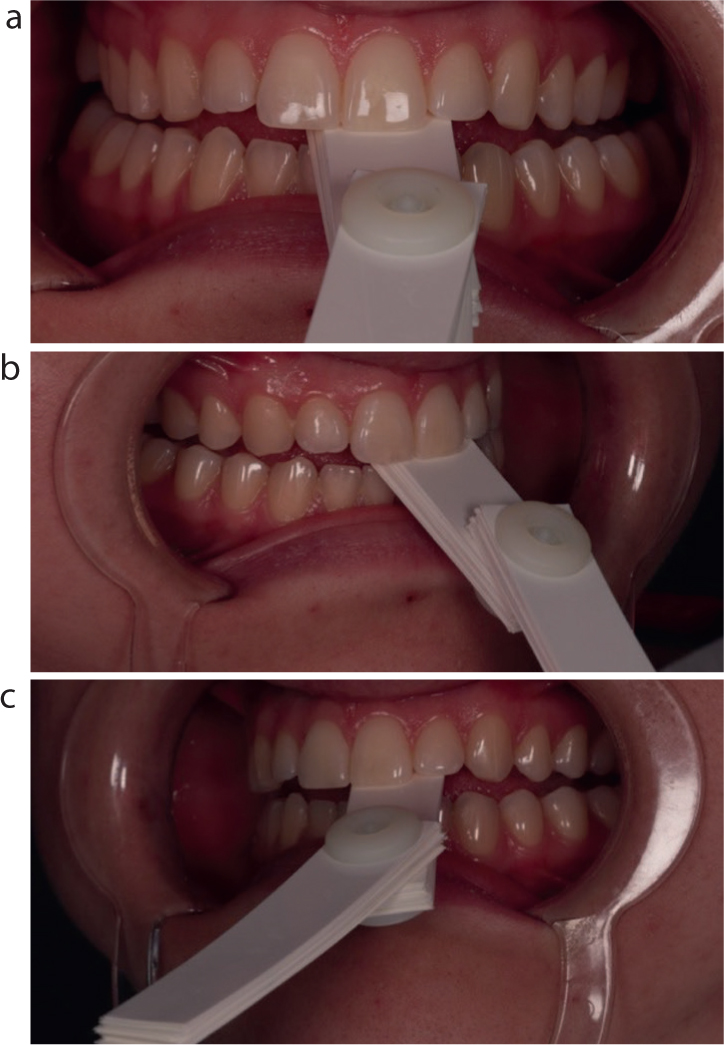
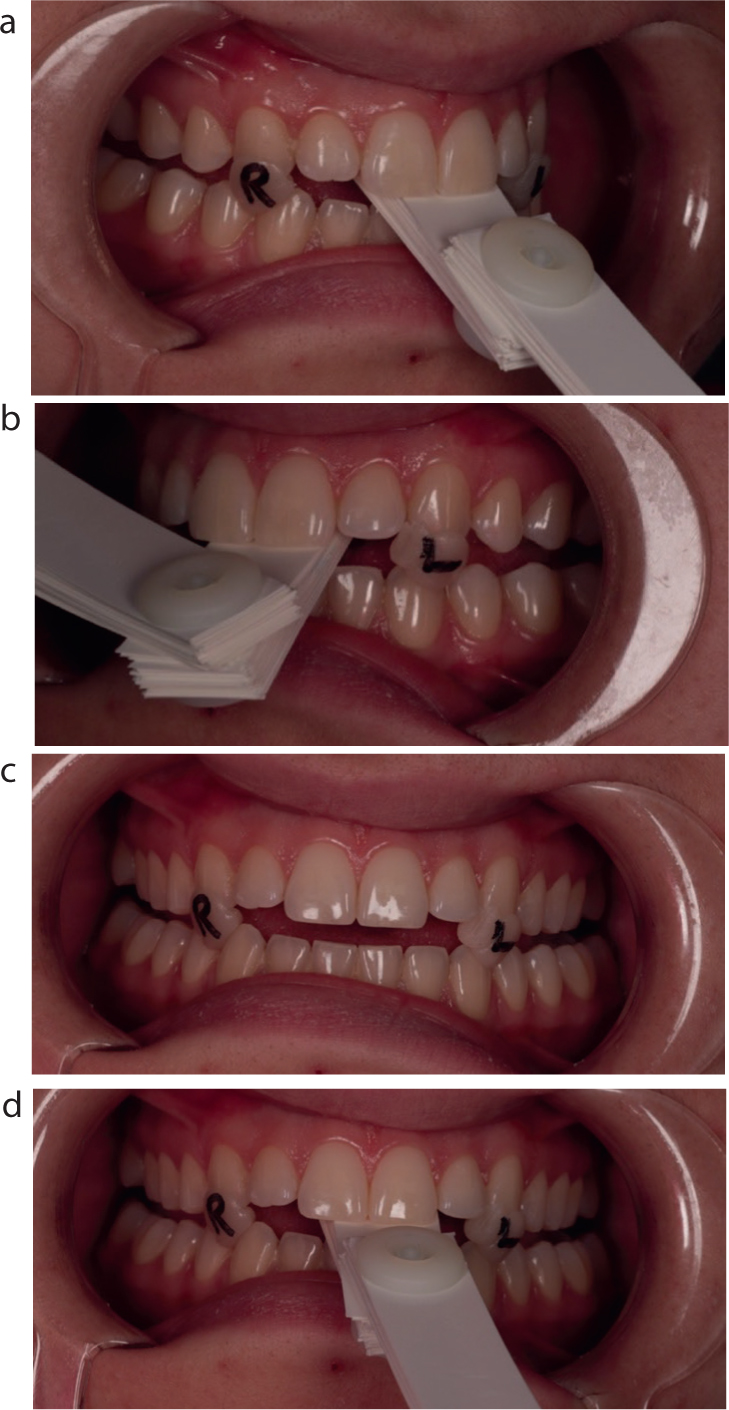
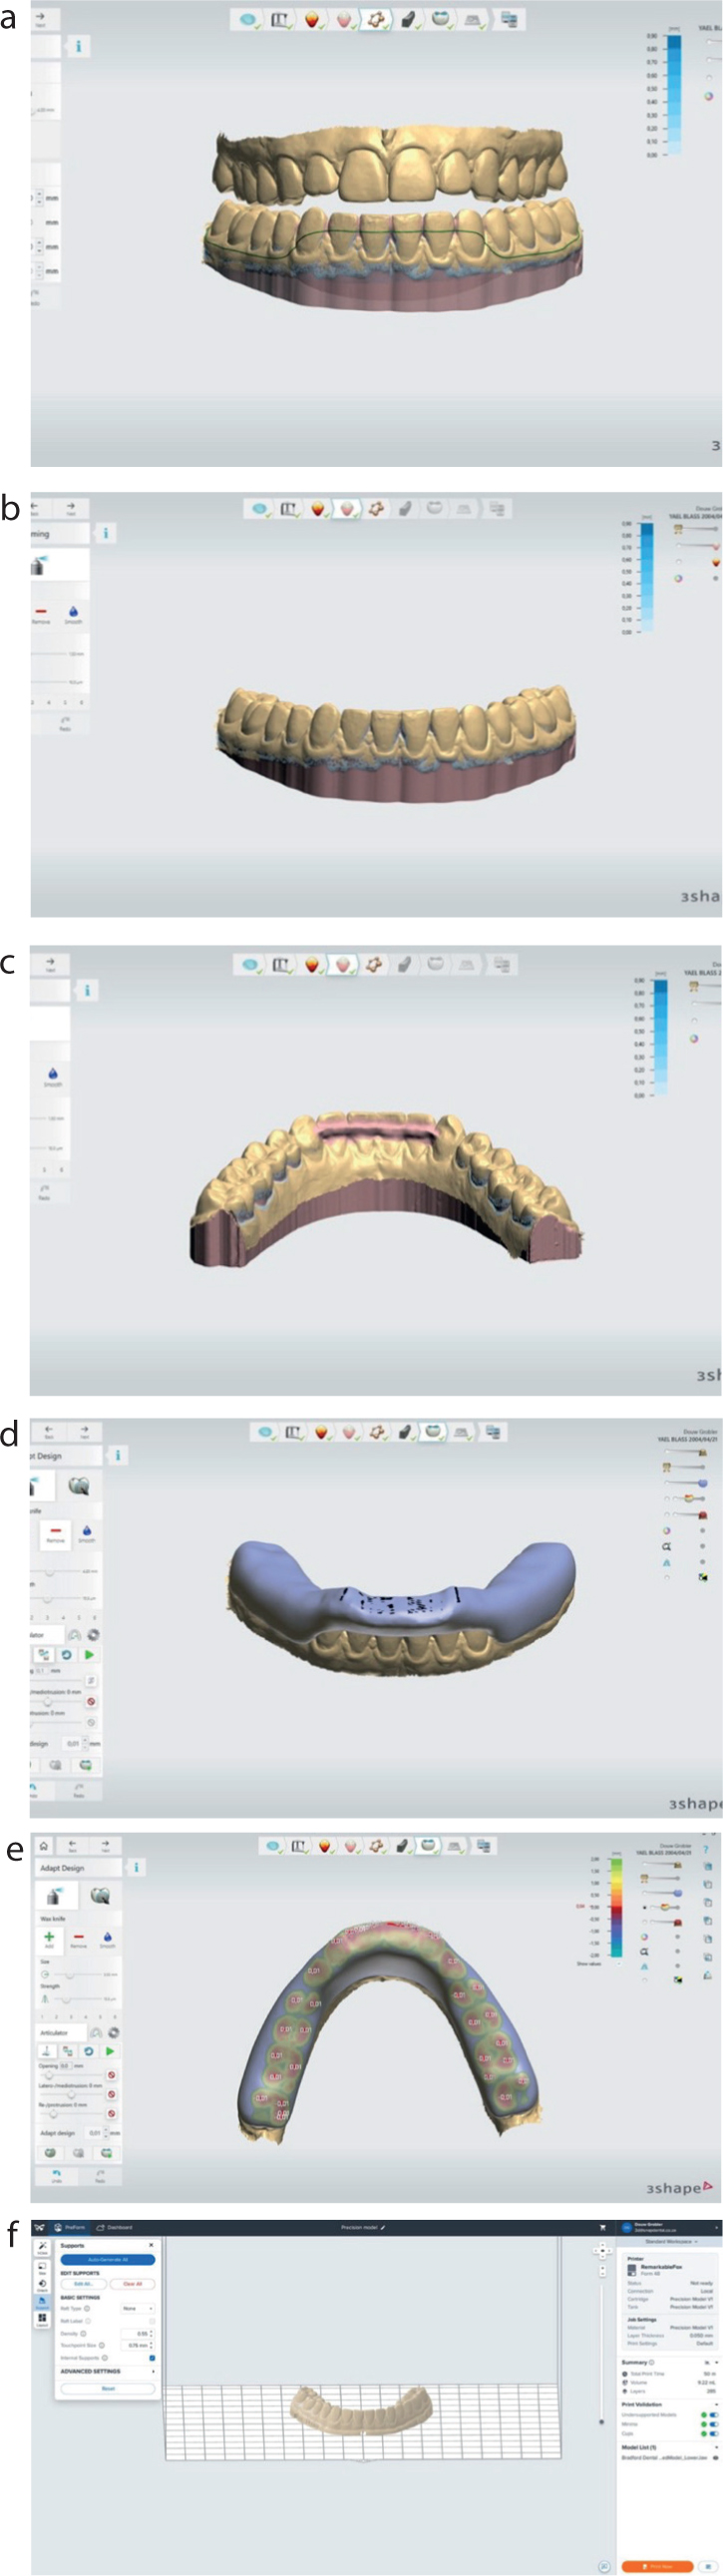
The scanning protocol, as recommended for this system, involved capturing the lower arch first, followed by the upper arch, and concluding with a bite registration scan. To create the desired occlusal clearance for a Michigan splint or Tanner appliance, the clinician must open the patient's bite to accommodate the splint material in a digital model. A leaf gauge was used to quantify the inter-occlusal clearance required, ensuring that no posterior contact remained and that the condyles had repositioned accordingly (Figure 2). A direct composite material was then used to construct anterior jigs on the canine teeth bilaterally to stabilize this recorded relationship during the scanning process, thus minimizing the risk of mandibular displacement (Figure 3).
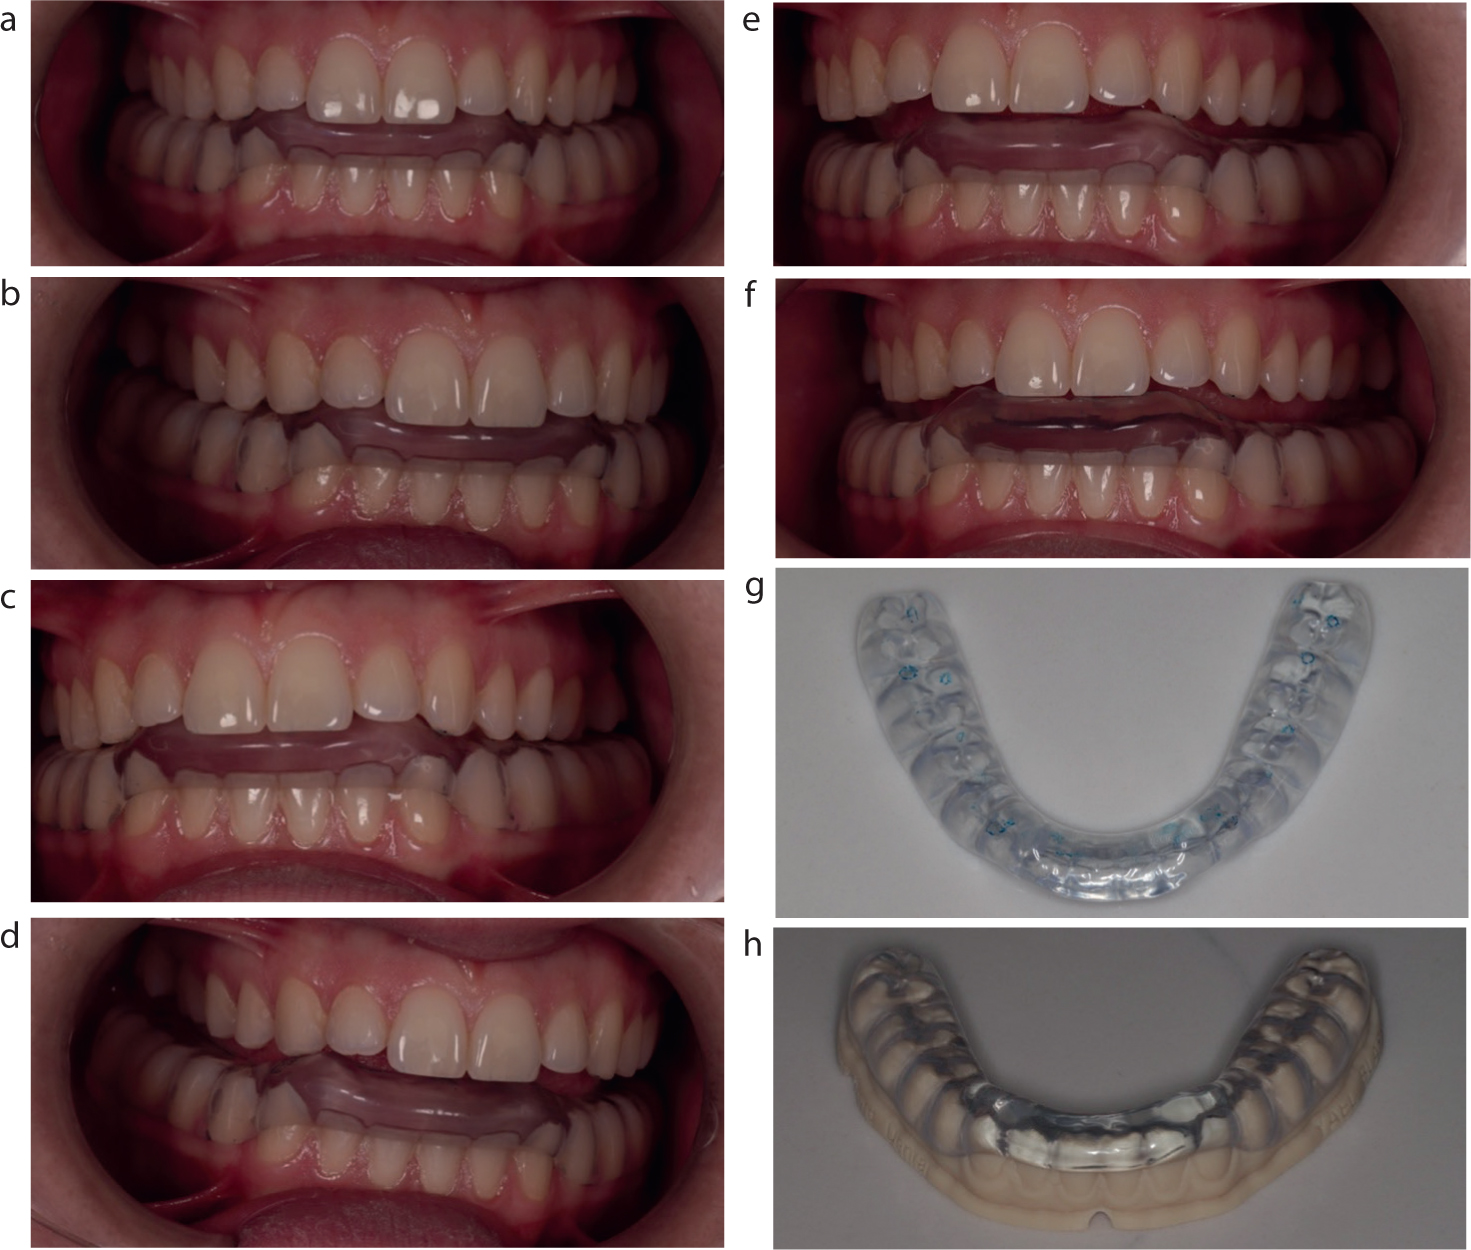
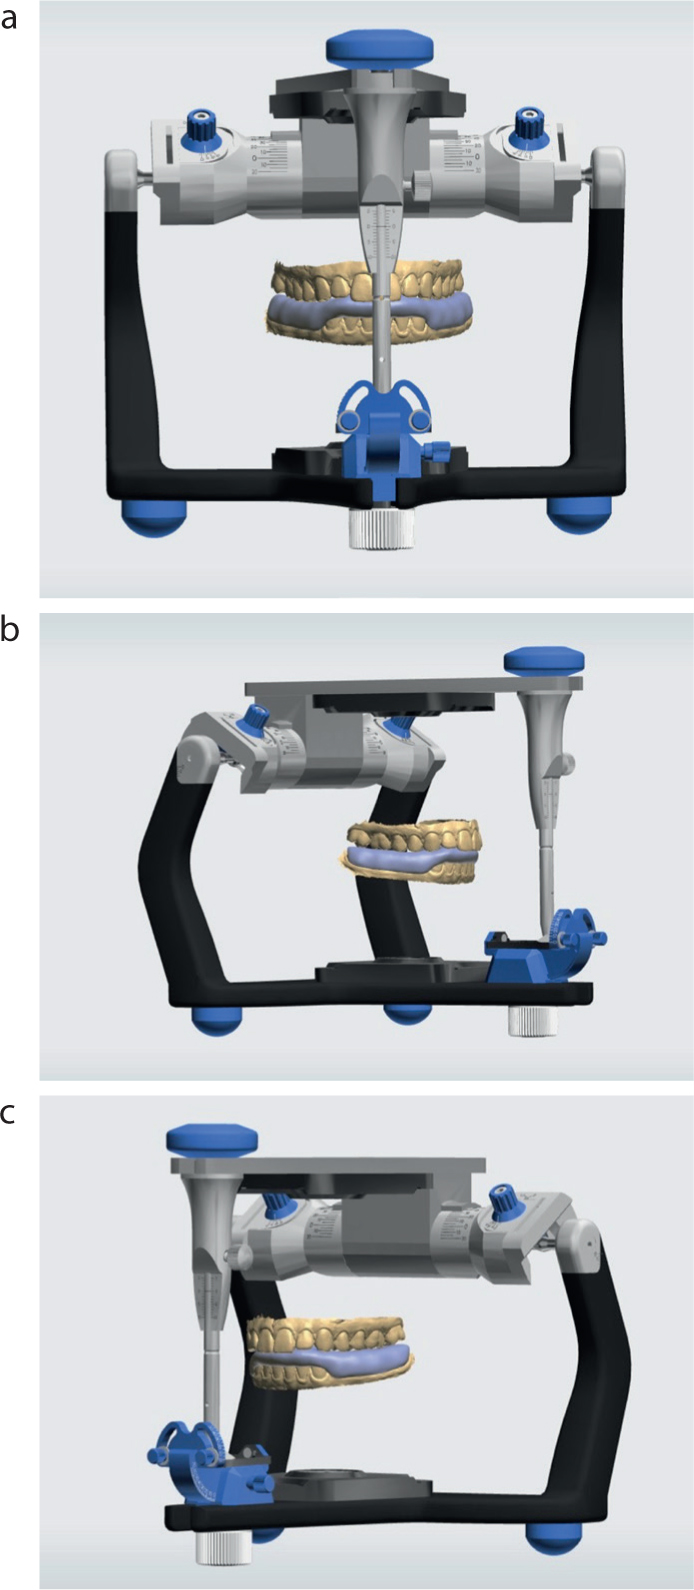
Once the bite was digitally recorded (Figure 4), this information was transferred to the technician's design software, where it was virtually mounted onto a digital semi-adjustable articulator (Figure 5). The appliance was then digitally constructed by the technician in line with this relationship, both in the static and dynamic, to achieve a mutually protected occlusal scheme (Figures 6 and 7).
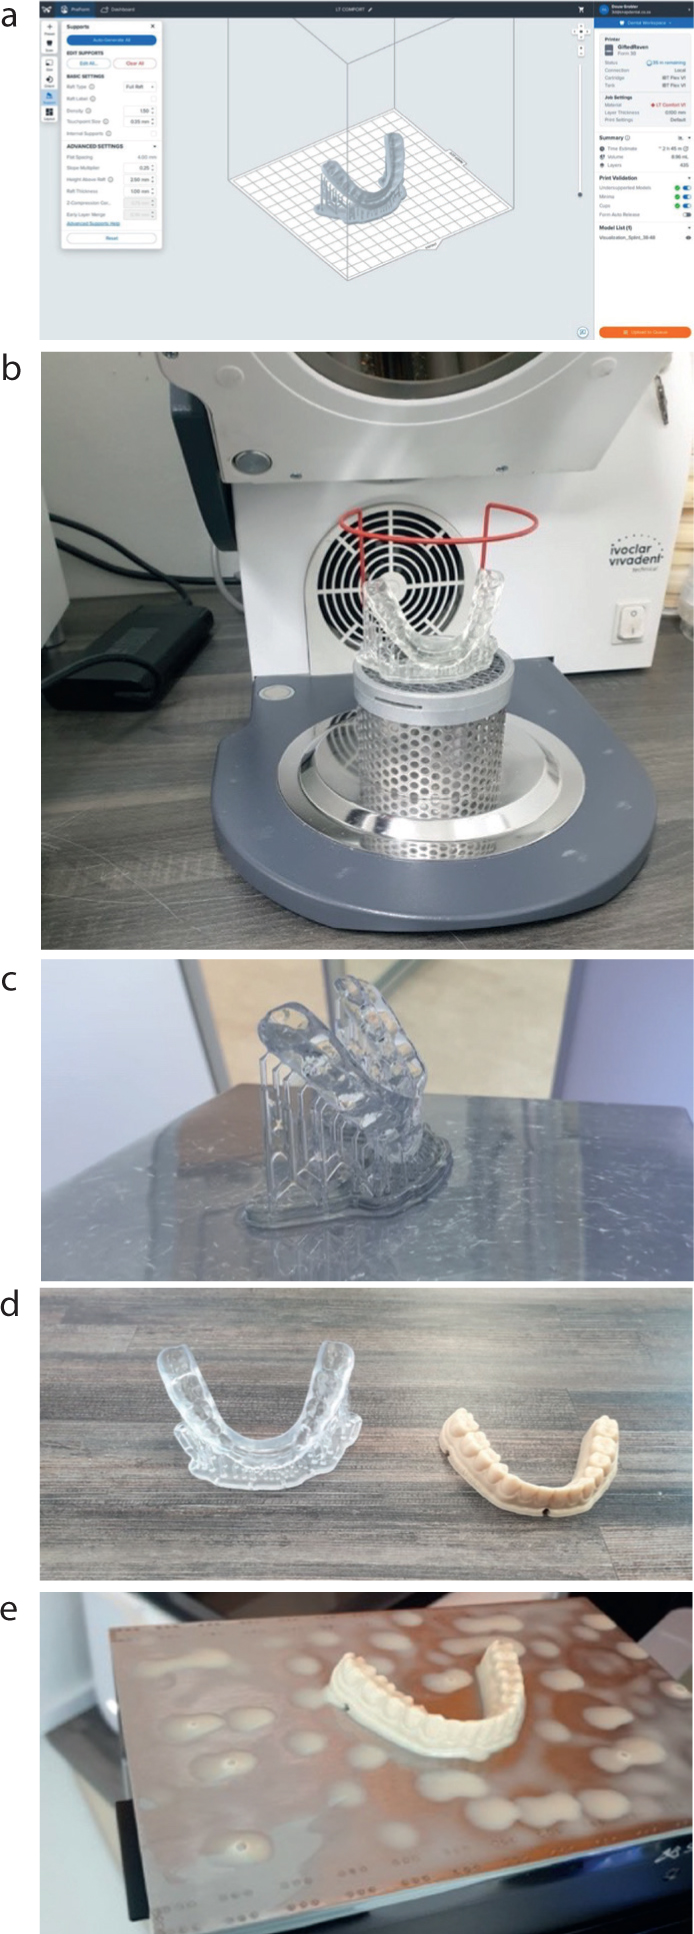
The milled appliance was fitted intra-orally, with single-point contacts verified using articulating paper (Figure 4). Canine guidance and posterior disclusion were achieved in lateral and protrusive movements, as evidenced in clinical observation.